Step 3 - Creating Attributes
If you do not already have the Data Administration form opened select Manage Feature/Attribs etc. from the Tools menu, otherwise, click on the Attributes tab at the top of the form.
In this part of the tutorial we will create two new attributes
Click on the New button to create a new attribute.
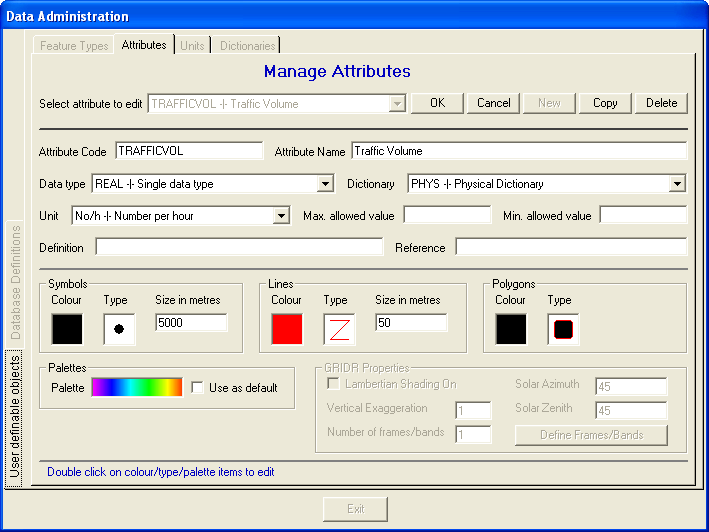
You must now enter some details for the new attibute. Each attribute must have a unique code which STEMgis uses internally. In this example use a code of TRAFFICVOL in the Attribute Code textbox. This code is used in the attribute CSV file that you will load later.
In the Attribute Name text box type - Traffic Volume. This is the name of the attribute as it is displayed to the user.
Select Physical Dictionary from the Dictionary dropdown list.
Select Number from the Unit dropdown list.
Double-click on the Lines - Colour box to change the default colour of this feature type. Select a red colour.
Specify the size of the line as 50 m otherwise the line will look too wide if left at the default value of 5000 m.
The Attribute form should now look like:
Click on the OK button to enter the new attribute.
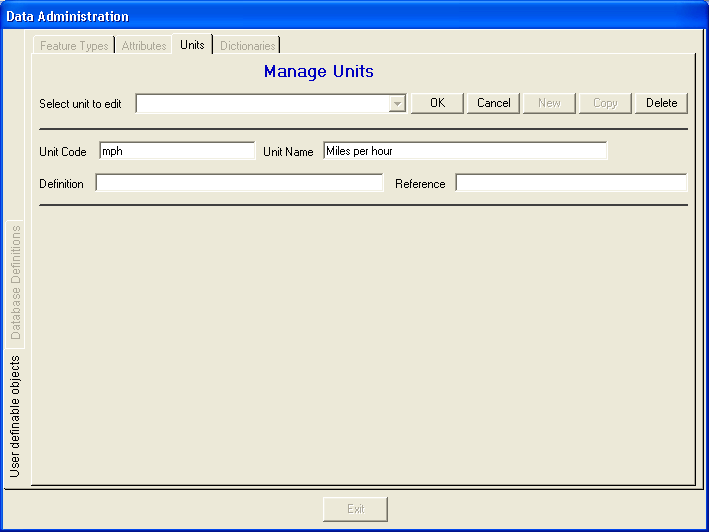
Before entering a second attribute you will need to add a new Unit. Click on the Unit tab and on the New button.
Enter the following details:
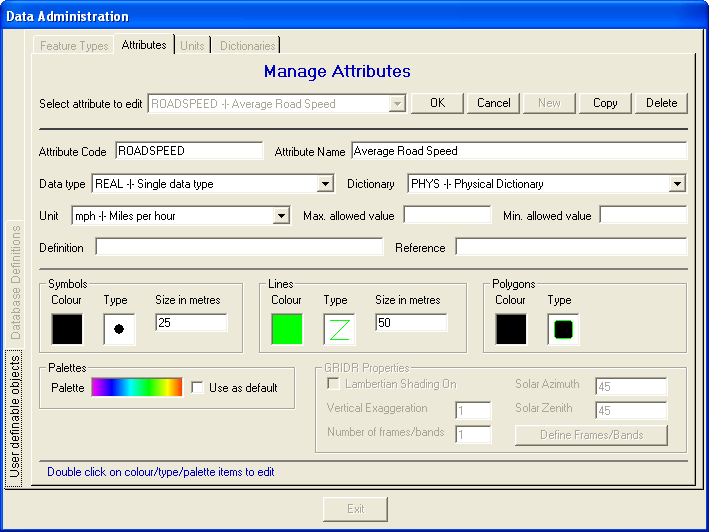
Return to the Attributes tab and then enter a second attribute:
Double-click on the Lines - Colour box to change the default colour of this feature type. Select a green colour.
Specify the size of the line as 50 m otherwise the line will look too wide if left at the default value of 5000 m.
When you have entered the second attribute click on the Exit button to return to the main window.
| Browser Based Help. Published by chm2web software. |